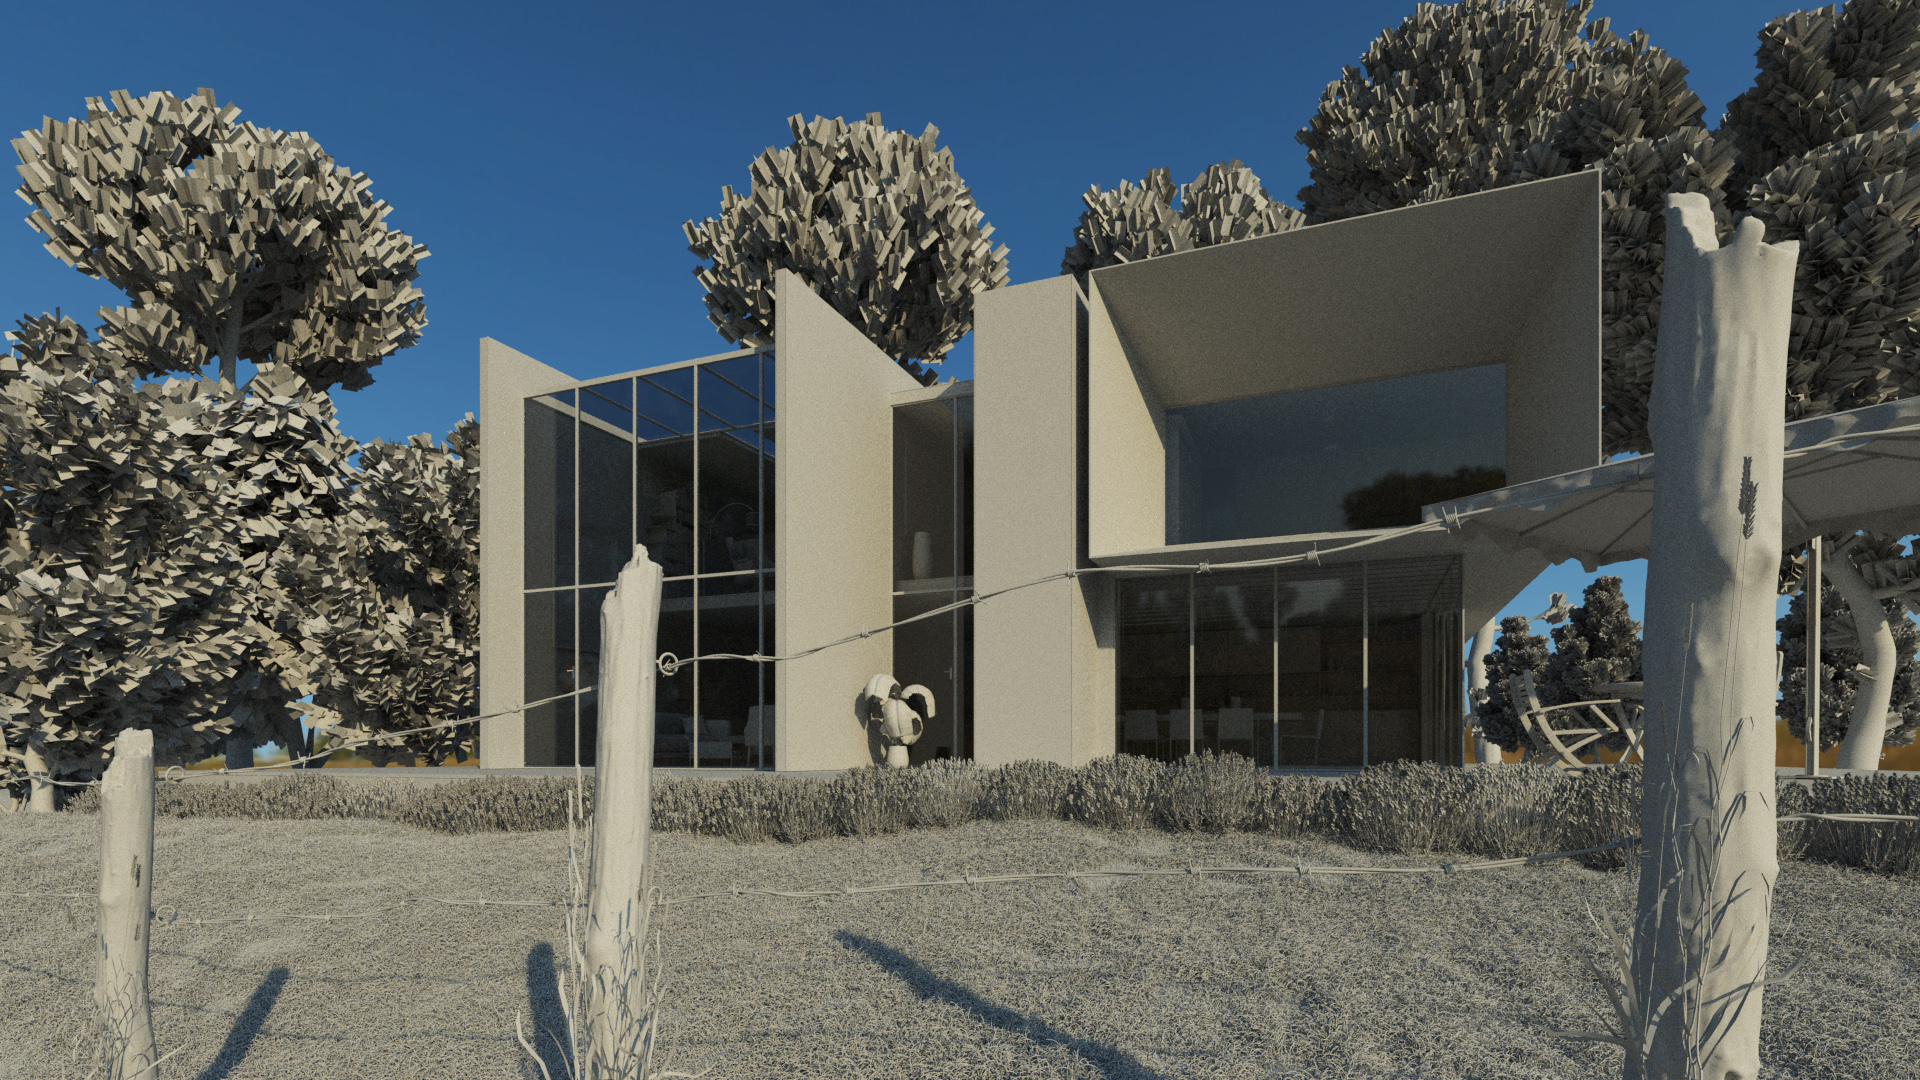
Architectural visualization project done for lectures “Advanced Rendering” (Master Media Informatics) given during summer semester 2019. The project was done with Autodesk Maya and Chaosgroup V-Ray Next with some post production work in Photoshop. Rendering by C. Malerczyk
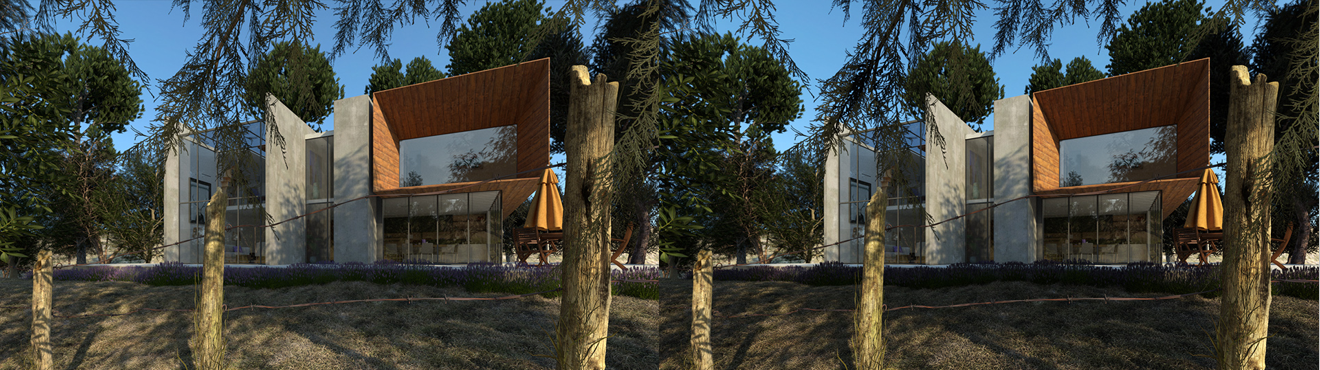
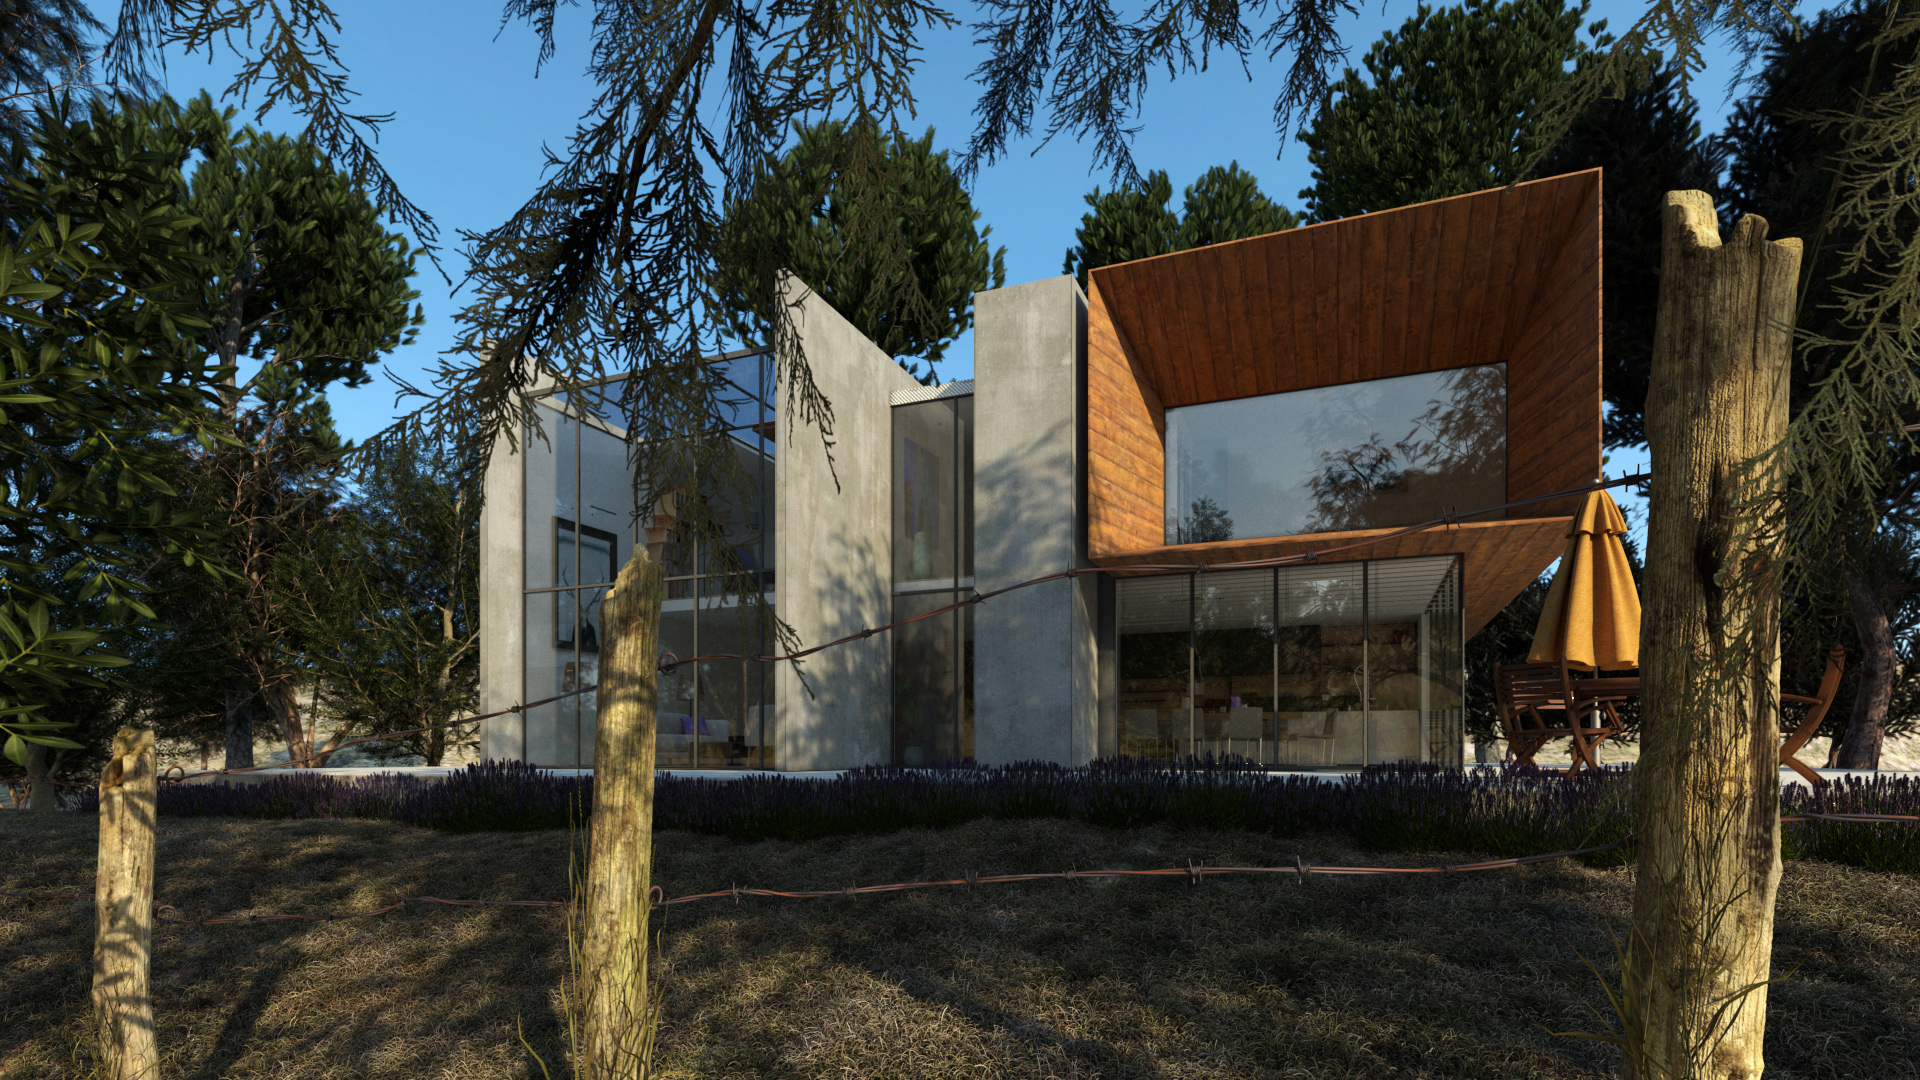
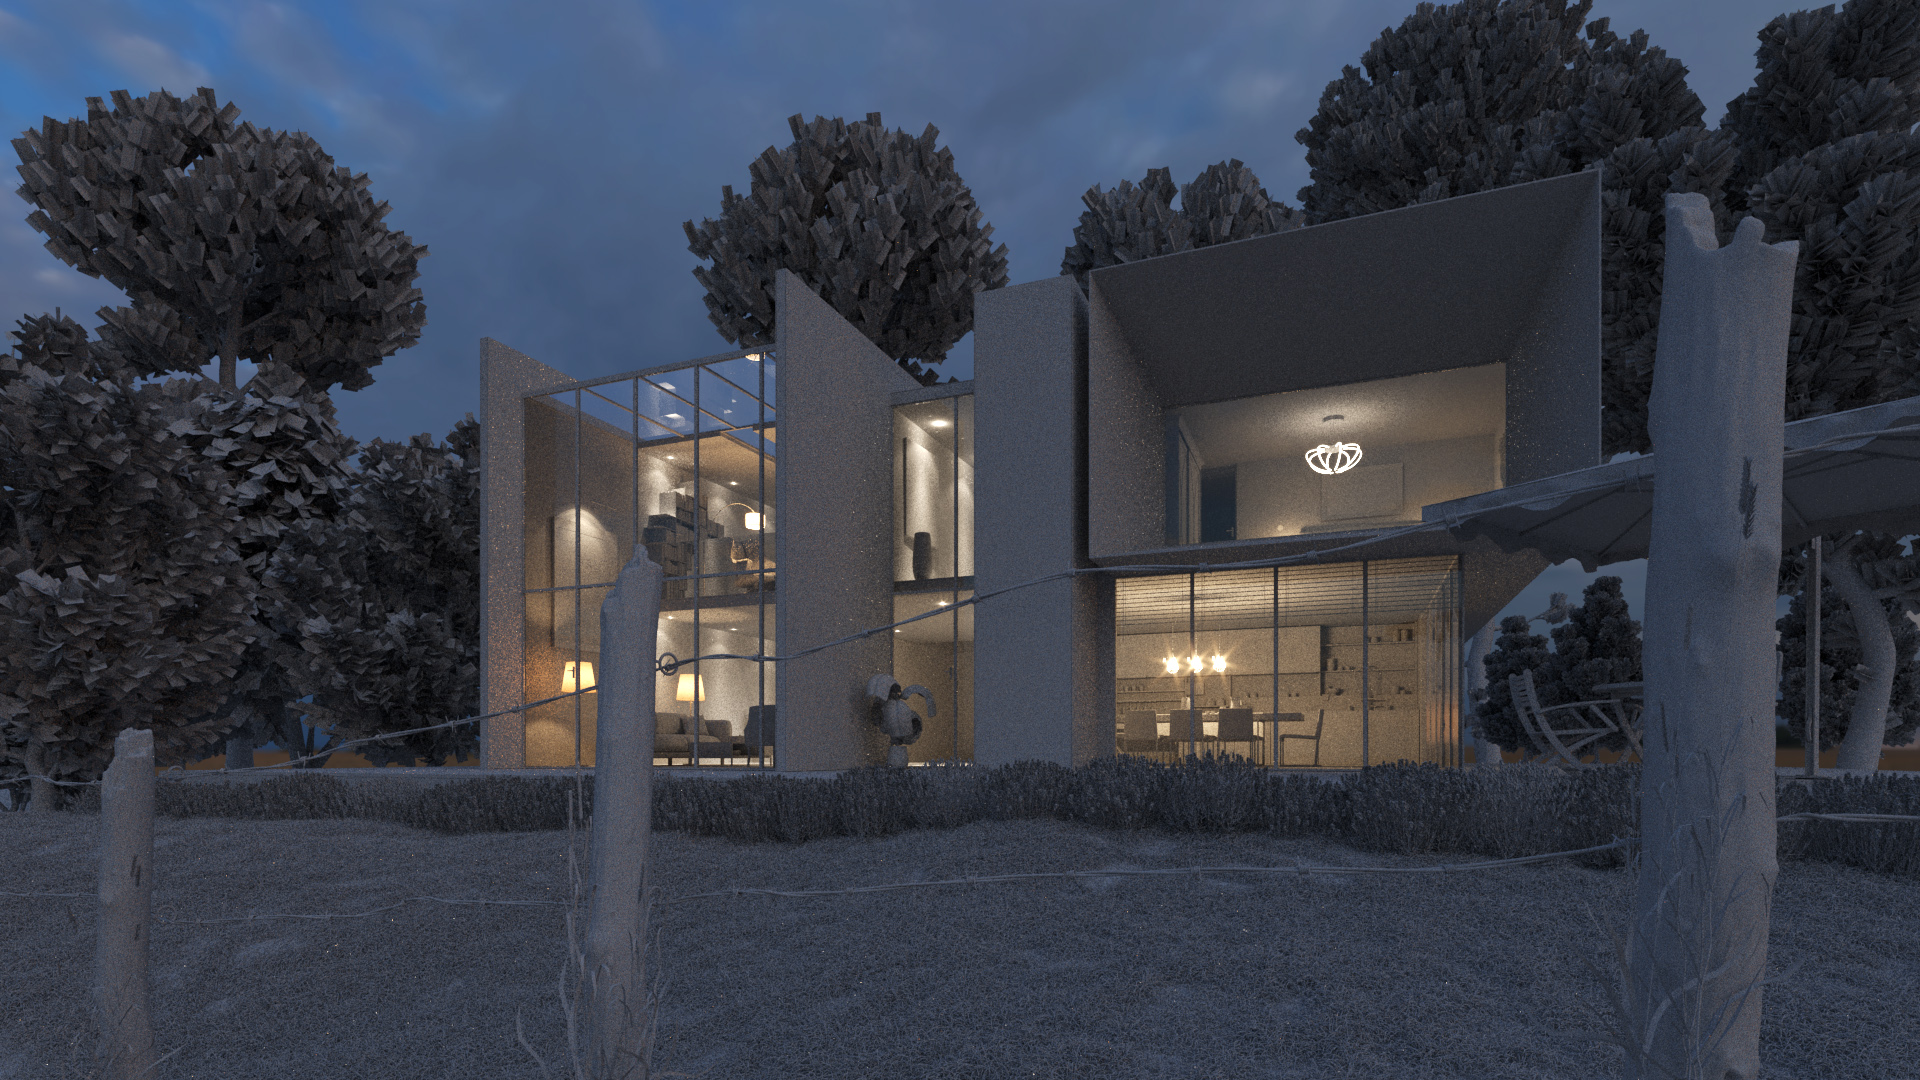
The idea and inspiration for this project was to create a rendering of a modern residence located somewhere in the Mediterranean area. Even if difficult to see at first, the villa’s terrace is surrounded by lavender bushes with their typical scent. The subtle purple of the lavender is repeated inside of the building with some assets of the same color such as cushions, blankets or dishes in the kitchen.
{gallery}gallery/LavenderHouseRenderings{/gallery}
Introduction
The model of the building is a very simple and low poly mesh with just approximately 25.000 polygons.
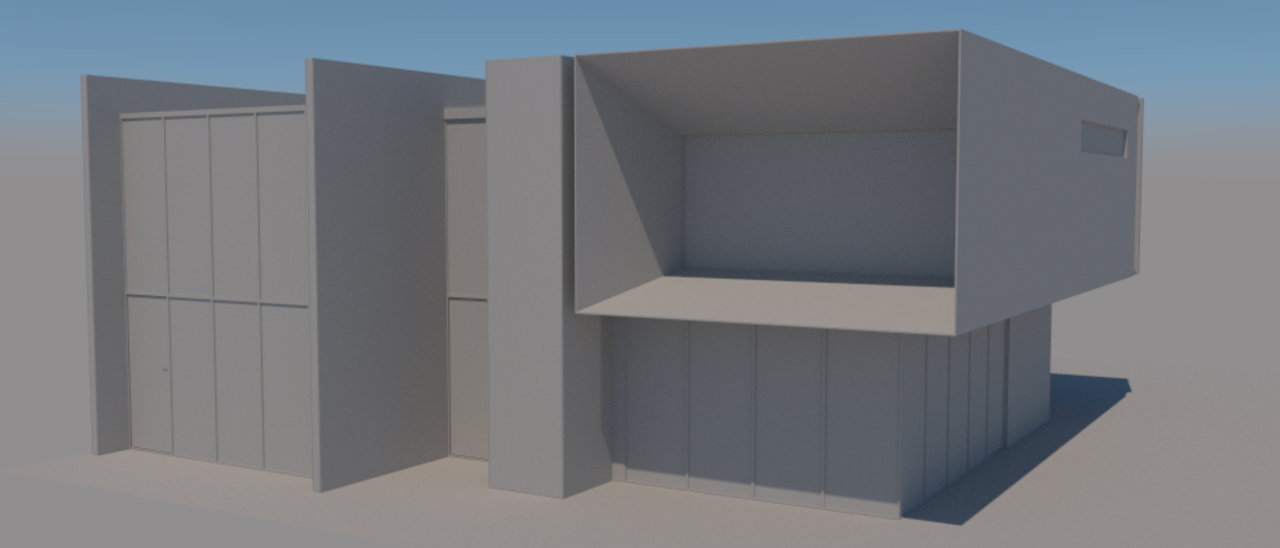
Important for plausible shading is a precise UV-Mapping of all relevant part of the mesh, but pretty simple for this mesh with plain surfaces only.
Windowpanes
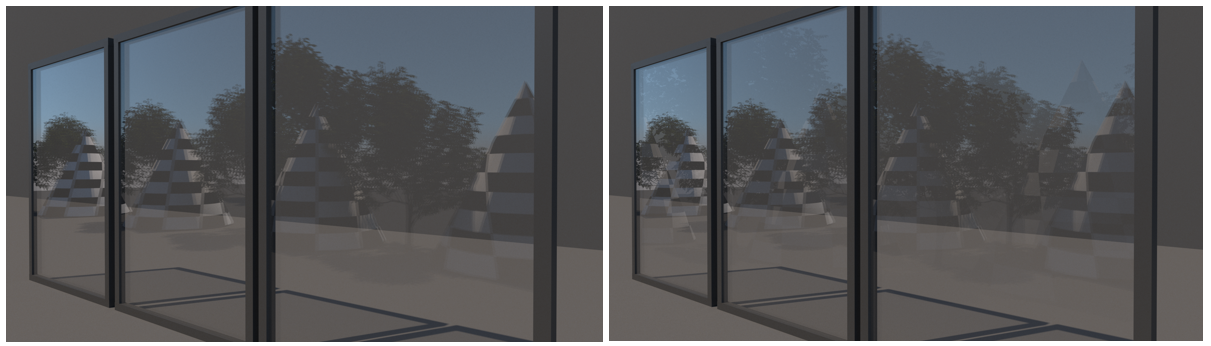
Some extra research was done to create realistic reflections of double-glazed windows. Each windowpane was modelled with real world dimensions of two 4 mm thick sheets of glass with an IOR of 1.52 with a distance of 16 mm simulating the interlayer of noble gas such as Argon. For configuring the VRayMtl shader, enabling the checkbox Reflect on Back Side and a sufficient high max tracing depth (e.g. 10) was necessary.
Shading
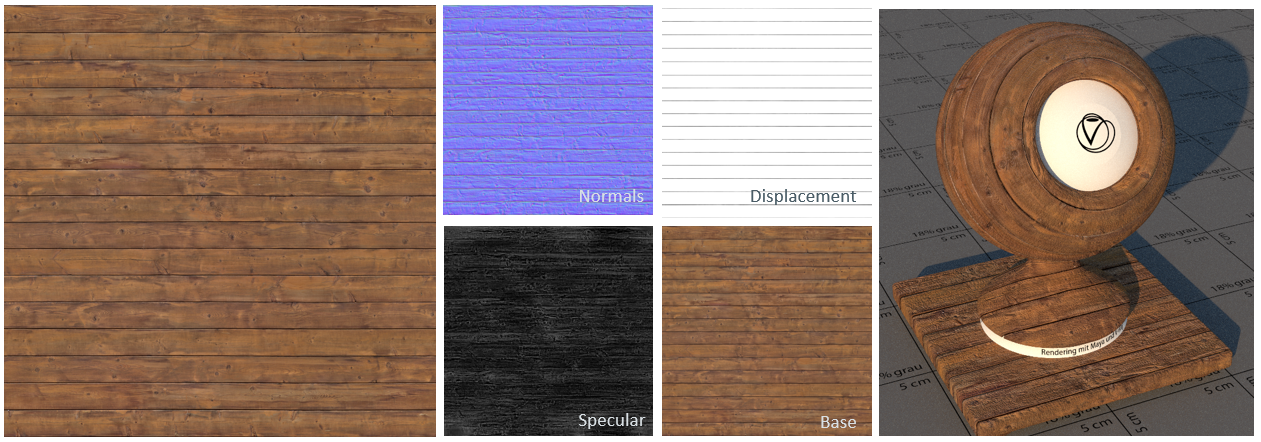
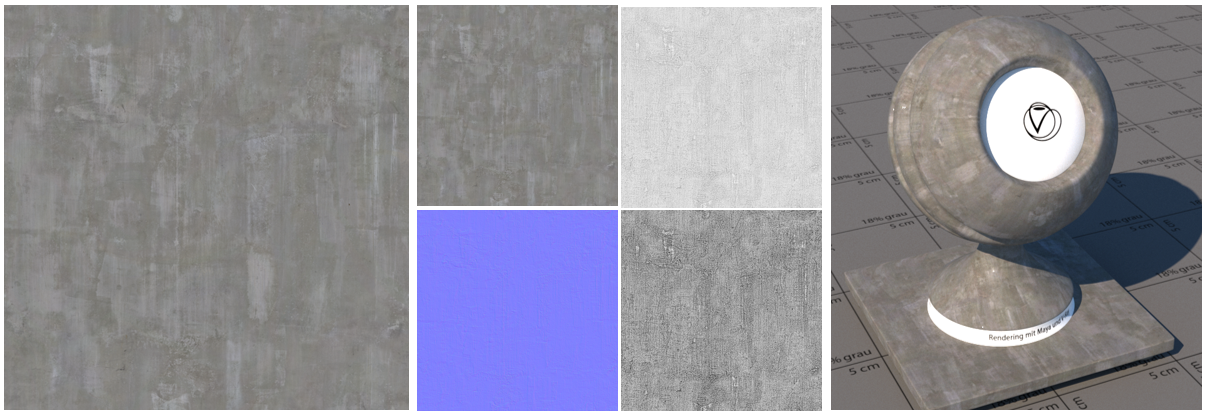
Texture maps from www.textures.com are used for shading the building. Initial tests on a shader template are done with free texture versions at 1k maximum. Later, 4k versions are used as final maps. Secondary maps are generated with ShaderMap4 and in most of the cases some Photoshop filtering for the generation of the displacement map were necessary.
For the dark wood shader the automatically generated Ambient Occlusion map was used as a starting point to manually create the joints between the planks in Photoshop.
The idea for the facade elements was a dark and smooth fair-faced concrete wall contrasting the natural and rough wood elements.
Some additional filtering had to be done to generate the maps for building the shader of the perforated metal plates.

Again, the displacement map automatically generated by ShaderMap4 was to wavy to create precise and sharp edges for the transformation of the polygon edges. Better results arise from a manually thresholded AO map.

Interior Assets
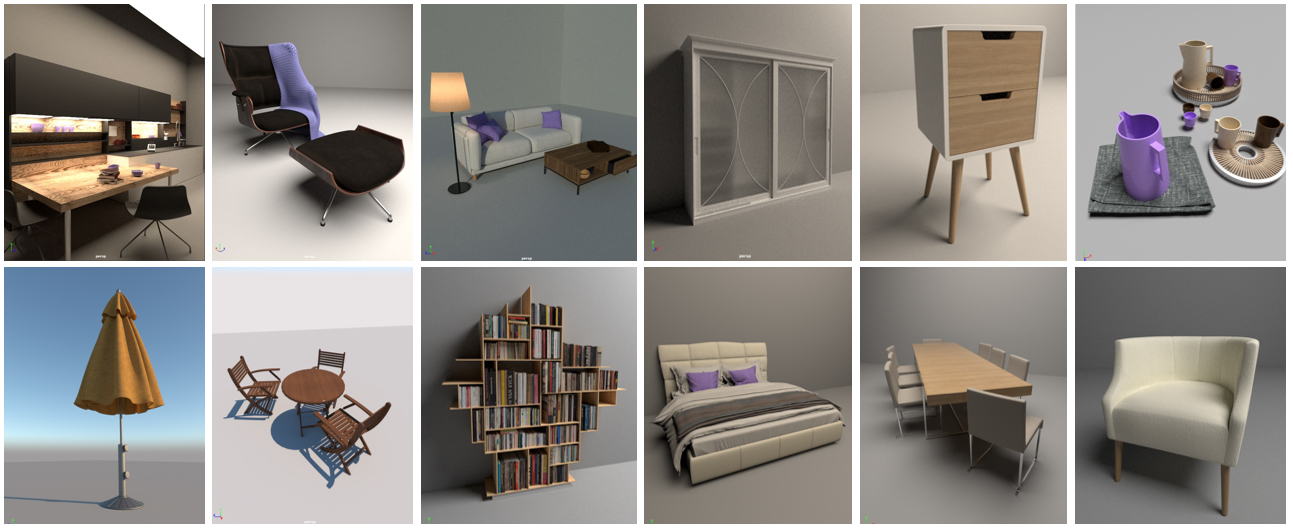
For all interior assets free models from the internet have been used. Even without the need of modeling and UV mapping, all assets needed new V-Ray materials.
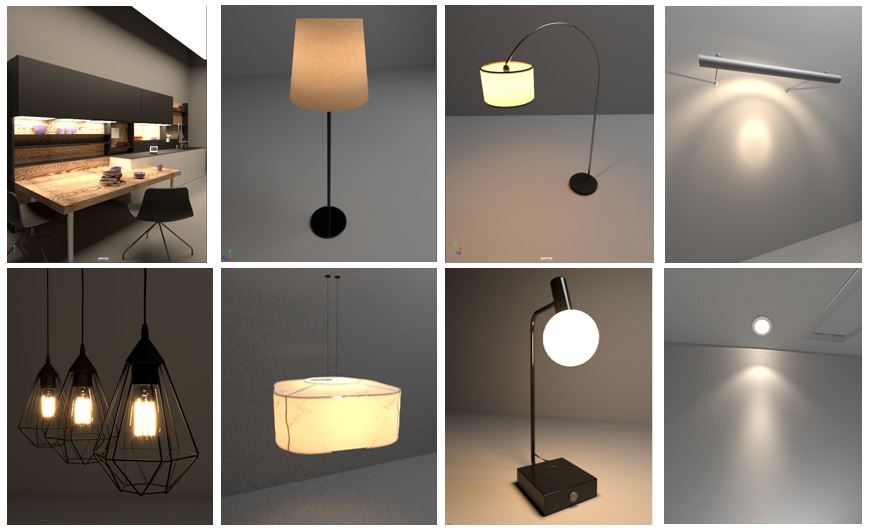
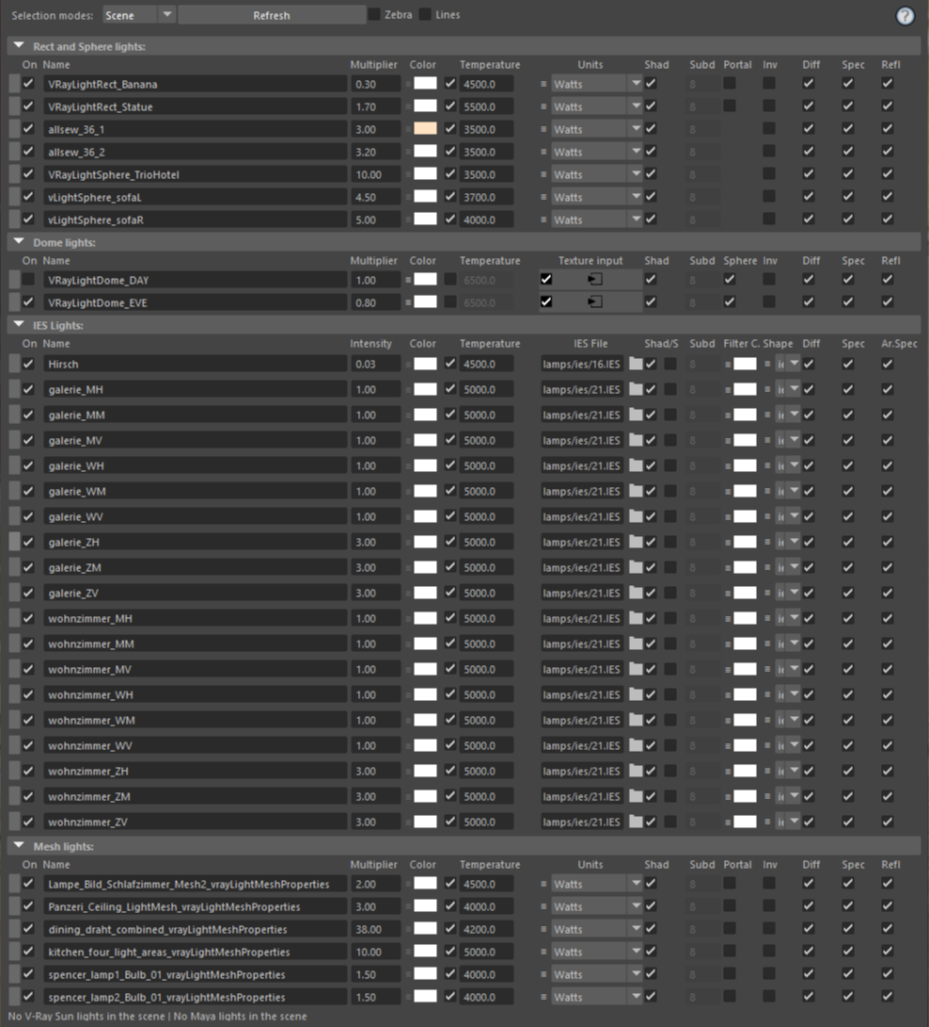
Eight different lamp models have been used to create the interior lighting. Three of them use the VRayMtl2Sided to create a translucent surface consisting of fabric.
Vegetation
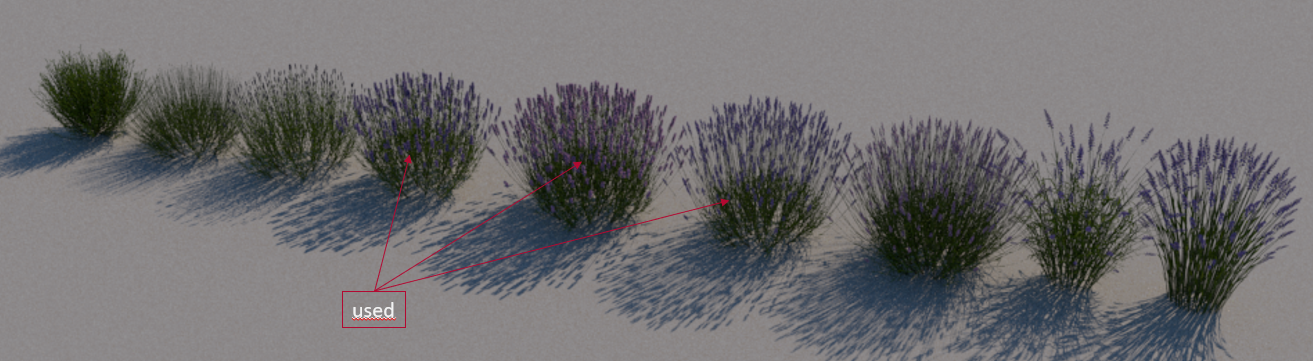
All vegetation assets used in the scene are taken from the Xfrog complete plants bundle. Three of the eight lavender bushes (AG11_Lavandula_angustifolia) are scattered 35 times in front of the concrete base of the residence.
Six different models of four species of mediterranean trees are used in the scene: Sea pine, French tamarisk, prickly juniper and lentisk.
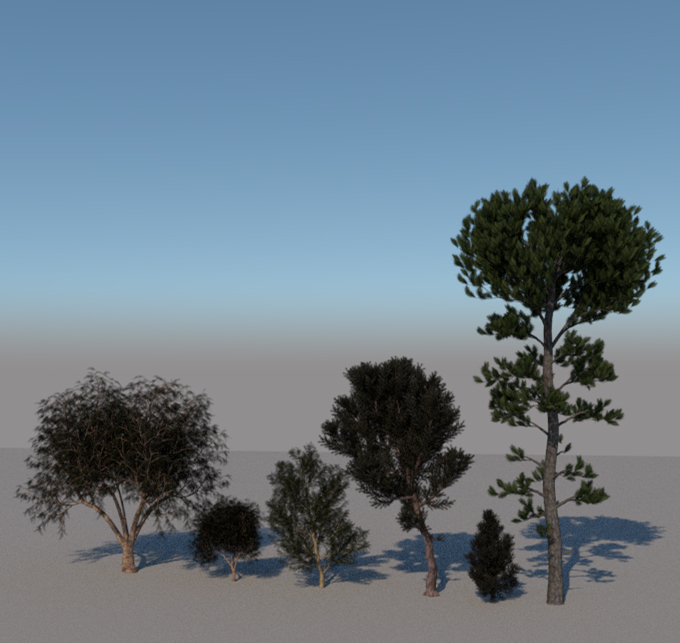
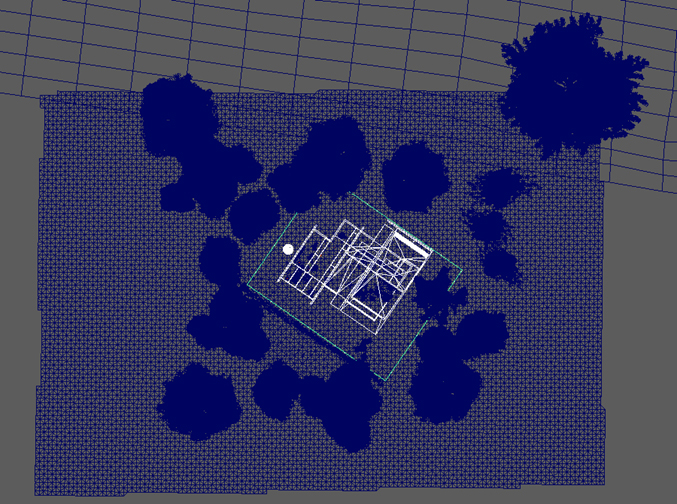
Overall, 21 trees of sea pine, French tamarisk, prickly juniper and lentisk are manually placed around the villa.
Environment
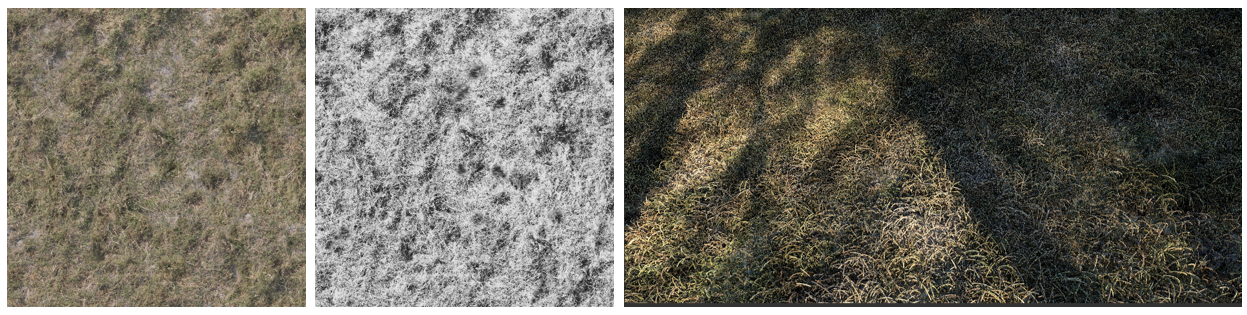
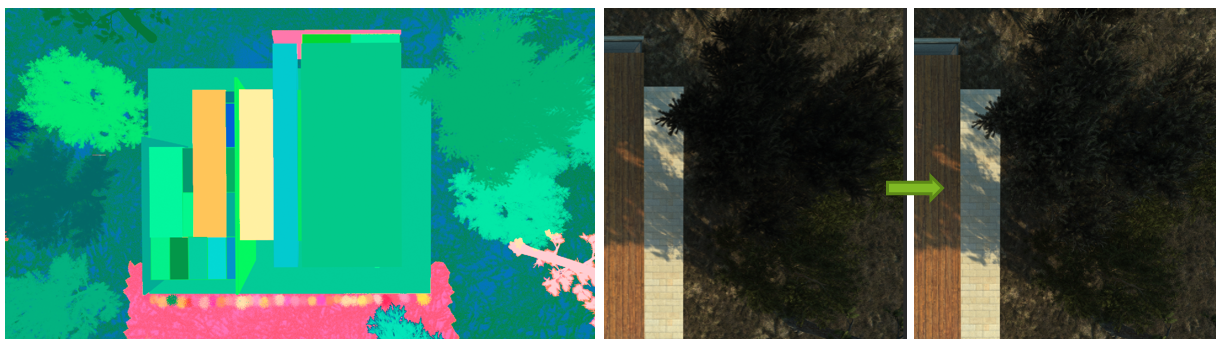
The dry grass of the environment is generated with VRayFur using a seamless grass texture. To ensure that at brighter (sandy) parts of the photo no grass is growing, a grey scaled version of the texture was manually processed in Photoshop and afterwards used as VRayFur Length map. 800 grass stalks are distributed per face with a thickness of 1.4 mm and a general length of 12 cm.
Lighting
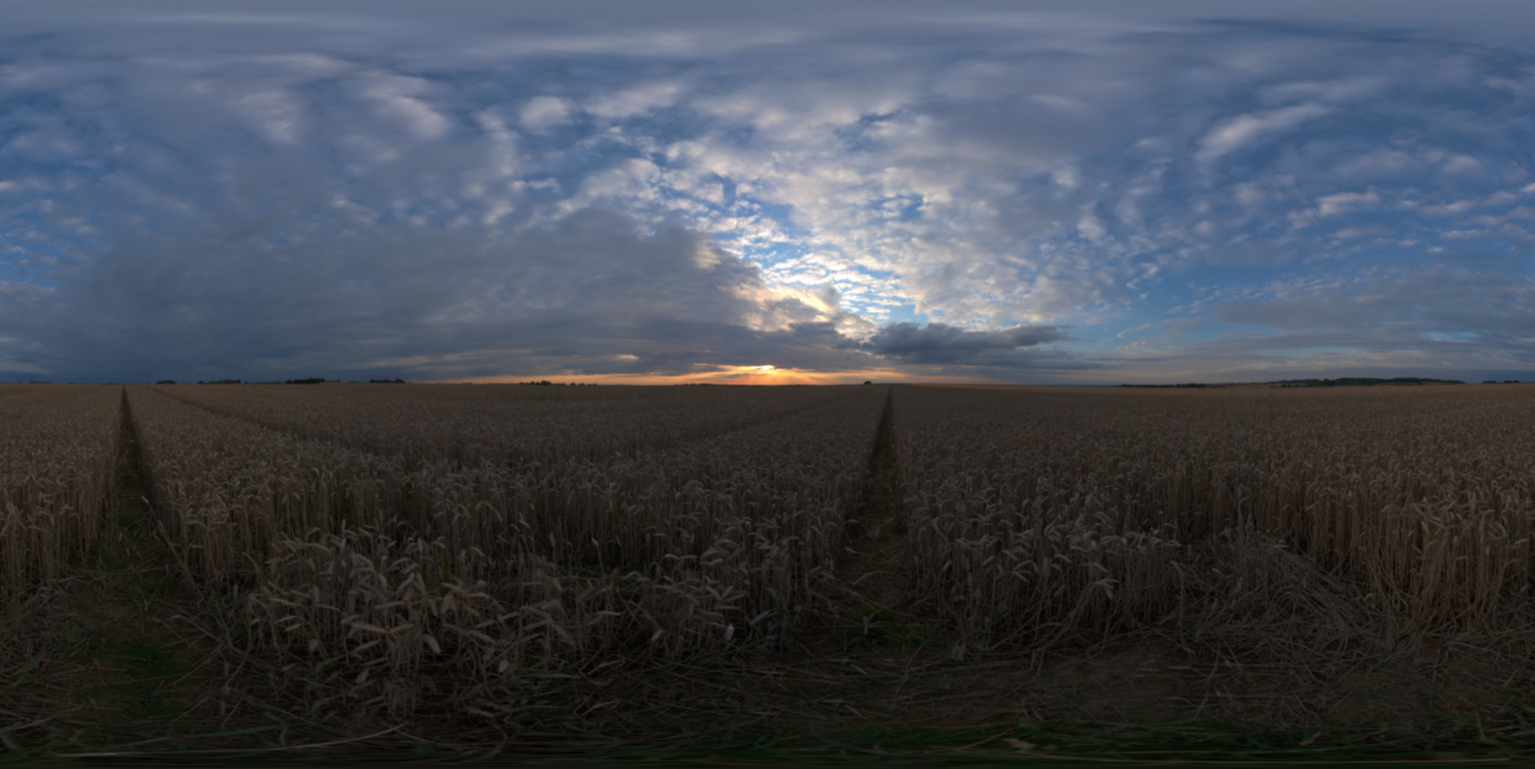
Two different HDRIs are used for Image Based Lighting (IBL) of the scene. The sunny afternoon is lit by an HDRI called Railway Bridge 02 from www.hdrihaven.com. The time of the day and the yellow color of the dry grass perfectly matches the designated late afternoon mood. Obviously, the railway bridge does not figure the scene and had to be removed in Photoshop.

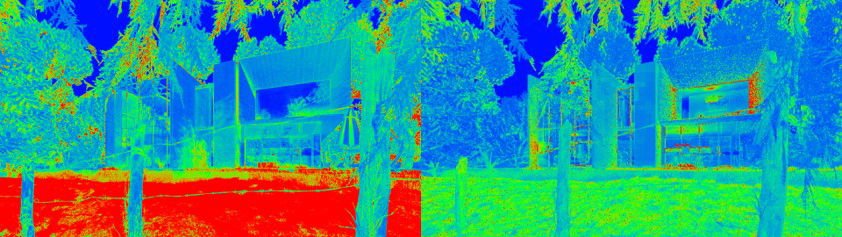
For the light balancing render of the afternoon scene a render layer with two collections has been as used: One for all non-opaque objects (such as windows) and another for all other meshes including vegetation with a pure grey diffuse material override. Due to the fact, that the override color does not make use of alpha maps, leaves of the trees are too dominant in front of the camera and those trees had to be hidden for light balancing even if the play of light and shadow on the terrain in front of the villa is missing.
For both early evening and foggy morning a HDRI from www.noemotionhdrs.net was used. Only the orientation of the EnvSphere for Image Based Lighting was changed by exactly 180 degrees.
To illuminate the interior of the building, 32 lights are used.
Again, a render layer with a diffuse grey material override for all opaque objects was used for fine tuning color temperatures and intensities of the lights.
Render Settings
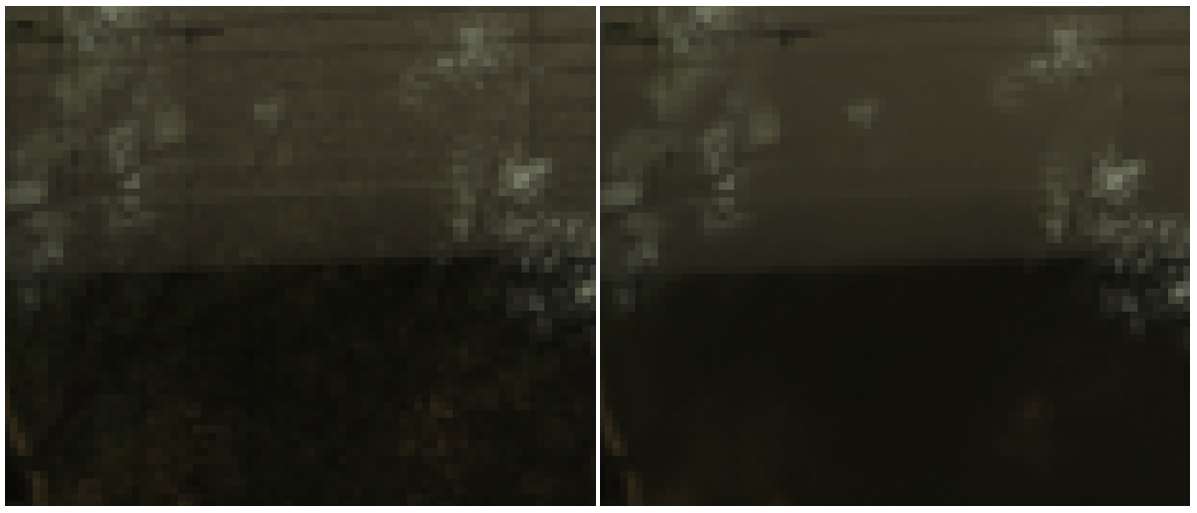
Main task configuring the render settings dialog is the minimization of noise in the final images at acceptable render times. Here, the Buckets threshold under Image sampler settings was set to 0.006 as the desired noise level. A Max subdivs value of 20 leads to mainly blue and green image in the samplingRate render element. Render time for a full HD resolution is between 2.5 (afternoon) hours and 8 (foggy morning) hours (admittedly on my travelling notebook even without Nvidia graphics card).
The VRay Denoiser as a render element is unfortunately not an option for renderings with highly detailed geometry like the Xfrog trees. Especially, the reflections in the windows lack of details if using the denoiser.
Post Production
There are no backplates used for the renderings. The resolution of the HDRIs are with 8k high enough to be used for rendering the background. Nevertheless, compositing was necessary. For all renderings Ambient Occlusion layers were rendered as VRayDirt extra textures and multiplied into the renderings in Photoshop. Additionally, Crytopmatte layers were used for individual corrections such as the brightening of a single tree or to change the saturation of the wood material.
Adobe Photoshop was used for compositing and other post production steps. Mainly for color correction, a slight contrast and blue channel enhancement and a reduction of the red channel have been applied.